Best Thermal Imaging Camera For Home Inspection Guide
A thermal imaging camera for home inspection helps you spot hidden problems before they become costly repairs. Whether you are a home buyer, seller, or inspector, this tool reveals what your eyes cannot see. In this guide, we break down the best options, key features, and practical tips to help you choose the right thermal imaging camera for home inspection.
Buying or selling a home is one of the biggest financial decisions most people make. A standard home inspection covers a lot, but it has limits. You cannot see behind walls, under floors, or inside your attic just by looking. That is where a thermal imaging camera for home inspection changes everything. It uses infrared technology to show heat patterns, which helps you find hidden problems early. In this guide, we walk you through everything you need to know to pick the best thermal imaging camera for home inspection for your needs.
Whether you are a homeowner checking your property, a buyer looking for hidden issues, or a professional inspector expanding your toolkit, this article has you covered. We will explore how thermal cameras work, what features matter most, and which models stand out in 2024. By the end, you will feel confident making the right choice.
Key Takeaways
- Thermal cameras detect hidden moisture, insulation gaps, and electrical hotspots that normal inspections miss.
- The best thermal imaging camera for home inspection should have good resolution, easy portability, and a reliable temperature range.
- You do not need to be a professional to use a thermal camera at home.
- Top brands like FLIR, Seek Thermal, and Hti offer great options at different price points.
- Using a thermal camera can save homeowners hundreds or even thousands of dollars in repair costs.
- Always pair thermal imaging with a standard inspection for the best results.
📑 Table of Contents
What Is a Thermal Imaging Camera?
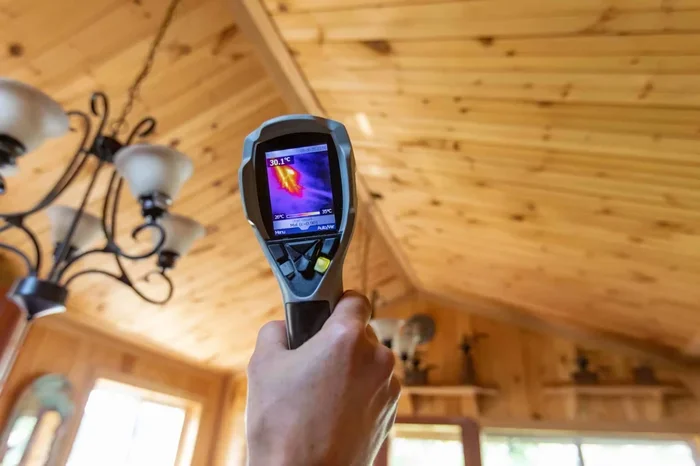
A thermal imaging camera reads heat energy instead of visible light. Every object gives off some level of heat, and the camera turns that heat into a color-coded image. Warmer areas show up in bright colors like red or yellow, while cooler areas appear blue or purple. This process is called infrared thermography.
For home inspections, this technology is incredibly useful. Walls, floors, and ceilings can hide serious problems. A thermal scanner can reveal issues that a visual check simply cannot catch. The best thermal imaging camera for home inspection makes these hidden problems visible and easy to understand.
How Does It Work?
The camera uses a special sensor called a microbolometer. This sensor detects infrared radiation and converts it into an electrical signal. The signal then creates a real-time image on your screen. You point the camera at a surface, and it shows you the temperature differences across that surface. No X-rays. No tearing open walls. Just instant, non-invasive scanning.
Why You Need a Thermal Imaging Camera for Home Inspection
A regular home inspector can only see what is visible. A thermal imaging tool goes far beyond that. Here are the main reasons a thermal camera for home inspection is a smart investment.
Detect Hidden Moisture and Water Damage
Water damage is one of the most common and expensive problems in a home. It often hides behind drywall, under flooring, or inside ceiling cavities. A thermal camera spots moisture because wet areas cool down faster than dry ones. The temperature difference shows up clearly on the thermal image. This lets you catch leaks, plumbing issues, and roof damage before mold grows or wood rots.
Find Insulation Gaps and Heat Loss
Poor insulation means your heating and cooling systems work harder. That wastes energy and raises your bills. A thermal imaging camera for home inspection shows exactly where warm air is escaping in winter or entering in summer. You can see gaps around windows, doors, attic hatches, and even missing insulation in walls. Fixing these spots can significantly improve your home’s energy efficiency.
Spot Electrical Hotspots and Safety Risks
Overloaded circuits, loose connections, and faulty wiring can cause fires. These problems often produce extra heat that you cannot see or feel. A thermal scanner detects hot spots behind outlets, inside panels, and along wiring paths. Catching these issues early can prevent a dangerous electrical fire.
Check HVAC System Performance
Your heating and cooling system should distribute air evenly throughout the home. A thermal camera helps you verify that vents are working properly and that there are no blockages. You can also check your furnace, water heater, and air conditioner for uneven heating or cooling patterns.
Top Features to Look For
Not all thermal cameras are the same. When choosing the best thermal imaging camera for home inspection, look for these key features.
Resolution and Temperature Range
Resolution determines how clear and detailed your thermal image will be. Higher resolution means you can see smaller temperature differences. For home inspection, a resolution of at least 160 x 120 pixels is a good starting point. The temperature range should cover typical indoor and outdoor conditions, usually from minus 4 degrees Fahrenheit up to 1,000 degrees Fahrenheit or more.
Portability and Ease of Use
You will be carrying this camera around the house, so it should be lightweight and compact. A handheld design with a simple interface works best. Some cameras connect to smartphones through an app, which makes sharing reports easy. Look for a model that feels comfortable in your hand and boots up quickly.
Image Quality and Reporting Tools
The ability to save images and videos is essential. Many thermal cameras let you add visual photos alongside thermal images. This is called a blended image, and it is very helpful for reporting. Some models also include built-in reporting software or export options for creating professional inspection documents.
Price and Value
Thermal cameras range from around 150 dollars for basic consumer models to over 3,000 dollars for professional-grade units. For a typical home inspection, you do not need the most expensive option. A mid-range camera between 200 and 600 dollars offers excellent value and more than enough capability for residential use.
How to Use a Thermal Camera During an Inspection
Using a thermal imaging camera is straightforward, but a few tips will help you get the best results.
- Check the temperature difference. For the best results, there should be at least a 10-degree difference between inside and outside temperatures. This makes heat loss and moisture patterns easier to spot.
- Scan slowly and steadily. Move the camera in a smooth, overlapping pattern. Rushing can cause you to miss small but important details.
- Scan from multiple angles. Some problems are easier to see from certain directions. Take thermal images from different positions to confirm findings.
- Document everything. Save every thermal image with notes about location, time, and temperature readings. This creates a clear record for your report.
- Combine with a visual inspection. A thermal camera is a powerful tool, but it works best alongside a standard visual inspection. Use both together for the most thorough results.
Common Mistakes to Avoid
Even with a great camera, mistakes can happen. Here are a few to watch out for.
- Ignoring environmental factors. Direct sunlight, wind, and rain can all affect thermal readings. Always scan in stable conditions for accurate results.
- Relying only on thermal imaging. A thermal camera shows temperature differences, but it does not tell you the exact cause. You still need to investigate further with moisture meters or other tools.
- Skipping calibration. Some cameras need periodic calibration to remain accurate. Check the manufacturer’s guidelines and keep your camera maintained.
- Not understanding the color palette. Different cameras use different color schemes. Learn what the colors mean on your specific model so you do not misinterpret the data.
Final Thoughts
A thermal imaging camera for home inspection is one of the most valuable tools you can add to your inspection toolkit. It reveals hidden moisture, energy loss, electrical risks, and more, all without damaging your home. The best thermal imaging camera for home inspection depends on your budget, your experience level, and how often you plan to use it. For most homeowners and inspectors, a mid-range model with good resolution, easy portability, and solid reporting features will get the job done right.
Take your time, compare options, and choose a camera that fits your specific needs. With the right thermal camera in hand, you will find problems earlier, save money on repairs, and gain real peace of mind about the condition of any property.
Frequently Asked Questions
Do I need special training to use a thermal imaging camera?
No, most consumer and prosumer thermal cameras are designed to be user-friendly right out of the box. However, learning how to read thermal images and understand temperature differences will help you get much better results. Many manufacturers offer free tutorials and guides online.
Can a thermal camera replace a professional home inspector?
A thermal camera is a supplemental tool, not a replacement for a full inspection. It helps you find hidden issues, but a professional inspector brings expertise, experience, and specialized tools that work together for a complete evaluation.
How much does a good thermal imaging camera cost?
Good thermal cameras for home inspection typically range from 200 to 600 dollars. Higher-end professional models can cost over 3,000 dollars. For most homeowners, a mid-range model offers the best balance of features and affordability.
Can thermal cameras detect moisture behind walls?
Yes, thermal cameras are excellent at detecting moisture behind walls. Wet materials cool differently than dry ones, so the temperature difference shows up clearly on a thermal scan. However, you should confirm findings with a moisture meter for accuracy.
What is the difference between a thermal camera and a regular camera?
A regular camera captures visible light, while a thermal camera detects infrared radiation, which is heat energy. A thermal camera shows you temperature differences across surfaces, making hidden problems visible that a regular camera simply cannot capture.
Is a thermal camera useful for energy efficiency checks?
Absolutely. A thermal camera is one of the best tools for identifying heat loss, air leaks, and insulation gaps. It helps homeowners pinpoint exactly where their home is losing energy, so they can make targeted improvements and lower utility bills.